When you use Rules™ standards library items or die templates they are usually used by finding the graphic for them on a style sheet that holds similar styles. The standards library is intended to provide you with a set of industry standard design templates to choose from to fit your exact requirements. If your way of manufacturing a design is different from the design in the template, create a new one from scratch or edit the existing one to be to your liking. See “Working with Libraries and Standards” for instructions on how to edit or create new standard design templates.
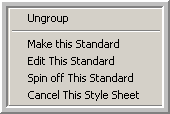
Adding new templates is easy once you have the design template finished. Open the style sheet itself that you want to add your new standard to by choosing File → Open. You can find the style sheet by looking in the folder “Cartons” or “Standards” found in the Rules program folder. For example, the style sheet for Roll End Styles is located in Cartons / RollEndBoxes / RESTYLES.vc6. Open the file for your new standard item and select the geometry you want to display in the style sheet. You probably don’t want all the driving dimensions, construction lines or other extraneous geometry since it is not important to make the graphic link to the file. You want a good graphic representation of the file for this purpose. Once you have selected just the geometry you want to show in the style sheet, copy and paste it into the style sheet. Use the Scale Tool to scale the geometry down to a size that fits in with the existing styles on the sheet. Rules will automatically fit the styles to the screen when you use the style sheet so try to make the addition neat and in line with the others. Keep the geometry for the new standard selected or select it again and then group the geometry into one group by choosing Arrange → Group from the main menu. Right click on the geometry and choose, “Make this Standard” from the popup that appears:
You should see the following error message:
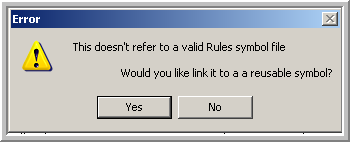
Click the “Yes” button and you should see:
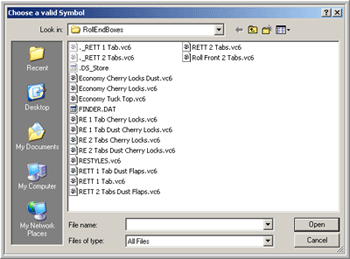
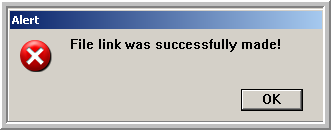
Navigate to the folder where your new standard design is located and click “Open” once you have it highlighted in the “Choose a Valid Symbol” dialog box. When you have successfully made a link to a file you will see this dialog telling the link has been made:
If you mistakenly choose the wrong file for the link, you can easily reassign the graphic link. Select the graphic for the standard item you want to re-link and choose Edit → Edit Objects from the main menu:
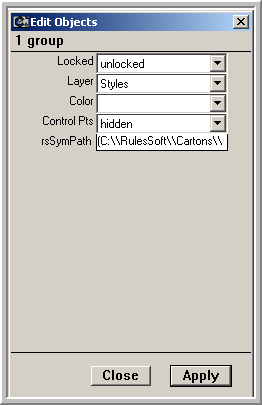
The last item in the list should be “rsSymPath” which is a variable that holds the path instruction for the selected standard item. Click on the word “rsSymPath” on the left of the text edit field to select the entire contents of the field and then click the Delete key on your keyboard. Now click the apply button to enter nothing for the value of the link variable. Close the Edit Objects dialog, and right click the graphic and select “Make this Standard.”
Continue as described above to reset the link for the standard library item. The more styles you add to the style sheet, the smaller the graphics will get on the screen when you use the style sheet. Style Sheets are designed to hold 10 or 20 of the most used design standards per category. You may find that you don’t have enough categories to get all the styles you use frequently into the provided style sheets. If you’re under service contract, call us at AlphaCorr™ and we’ll create some more menu items for you. You can add as many styles to a style sheet as you want. You can use text on top of or near by a graphic to help you remember the differences between similar styles or just to aid in finding styles quickly.